Robot Vacuum Can't Find Its Dock? Troubleshoot in This Order
Most docking failures come down to dock placement, the starting position, sensors or the charging contacts. Based on Roborock and ECOVACS official help docs, here's a troubleshooting order from easiest to hardest.
Contents
A robot vacuum that “can't find home” is a very common problem: it wanders for ages without getting back, or it does reach the dock but doesn't charge. The good news is that most cases don't require opening it up.
This article draws on the official help centers of Roborock and ECOVACS and turns them into a troubleshooting order from easiest to hardest. Details vary a lot between brands and models, so always follow your own manual.
First, figure out which case you have: it can't get back (can't find the dock), or it gets back but won't charge. The first is mostly about placement and sensors — start at step 1. For the second, skip straight to step 5.
Step 1: Check where the dock is
Roborock's placement advice is to put the dock against a wall, with at least 0.5 m clear on each side and at least 1.5 m clear in front. ECOVACS likewise recommends an uncluttered spot with at least 2 feet (about 60 cm) on both sides, and notes that sometimes just moving the dock slightly makes docking much more reliable.
These spots tend to cause trouble:
- The dock squeezed into a narrow gap between a sofa and a cabinet
- Slippers, cables or the edge of a rug in front of the dock
- The dock behind a door, in a hallway corner or another cramped spot
Step 2: Start from the dock and don't move it mid-clean
Roborock notes that if the robot didn't start from the dock, was picked up and moved by hand mid-clean, or got stuck on an obstacle, it may fail to return. ECOVACS also suggests checking whether the robot started cleaning from the dock.
So when testing docking, start from the dock and don't carry the robot to another room while it's cleaning.
ECOVACS also mentions that models with a laser distance sensor (LDS) remember where the dock is, which makes it easier to find. If you've just moved the dock, have it run one more clean starting from the dock and see.
Step 3: Do a 1-meter docking test
ECOVACS offers a handy test: place the robot about 1 meter directly in front of the dock and send it home using the button on the robot or the app.
- It docks: the robot and dock are most likely fine. Go back to steps 1 and 2 and check placement and the starting point. ECOVACS also specifically reminds you to make sure all the protective film on the dock has been removed.
- It can't dock even from 1 meter: keep going and check the sensors and the dock.
Step 4: Clean the signal area and sensors
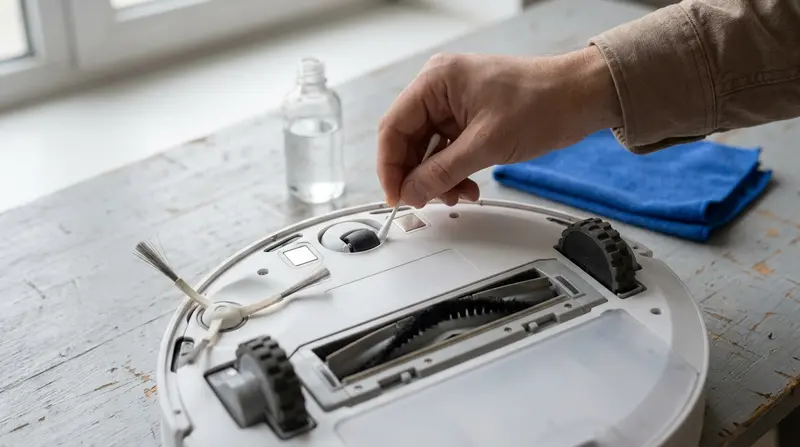
According to Roborock, the robot finds the dock using the signal emitter area on the front of the dock and the sensors on the front of the robot, so both need to be clean. Roborock's maintenance guide also recommends wiping the sensors with a dry, lint-free soft cloth.
Step 5: Docks but won't charge? Clean the charging contacts
If the robot gets back to the dock but doesn't start charging, a common cause is dirty or corroded charging contacts. Roborock's fix for its charging error (error 13) is to wipe dirt and rust off the charging contacts on the dock and the bottom of the robot with a cloth dampened with alcohol solution or an eraser (source).
Power off the robot and unplug the dock before cleaning the contacts. Alcohol is flammable, so let it evaporate completely before powering back on.
Step 6: Make sure the dock has power
On some Roborock models, for example, the indicator light on the front of the dock stays on when the robot isn't docked and turns off once the robot is on it (this varies by model; check your manual). If the light doesn't come on, Roborock suggests:
- Check that the power cable and the dock's socket are connected, and push the plug under the dock all the way in
- Unplug the dock, wait about 2 minutes, then plug it back in
- Try another outlet
Still not working?
If you've checked all of the above and it still fails to dock, it may be a hardware problem such as a sensor, the charging circuit or the mainboard:
- Still under warranty: contact official after-sales first; opening it yourself may affect the warranty
- Out of warranty: take it to a reliable repair shop for diagnosis. If you mail it in, send the robot and dock together so docking can be fully tested
- The battery is swollen: don't ship it yet — see What to do about a swollen lithium battery
Our repair service is still being prepared; we'll announce on X when it opens.
Checklist
| Order | Check | How |
|---|---|---|
| 1 | Dock placement | Against a wall; ≥ 0.5 m on each side, ≥ 1.5 m in front (Roborock's advice) |
| 2 | Starting point | Start from the dock; don't move it mid-clean |
| 3 | 1-meter test | Place it about 1 m in front of the dock and send it home manually |
| 4 | Film and sensors | Remove protective film; wipe the signal area and robot sensors with a dry soft cloth |
| 5 | Charging contacts | Clean with a cloth dampened with alcohol solution, or an eraser |
| 6 | Dock power | Plug the cable in firmly, unplug for 2 minutes, try another outlet |
References
- Roborock Help Center: What should I do when the robot cleaner cannot find its dock?
- Roborock Help Center: What should I do when error 13 occurs?
- Roborock Help Center: Roborock S6 General Maintenance
- ECOVACS Help Center: DEEBOT cannot find the charging dock
- ECOVACS Help Center: Why won't my robot find the charging dock?
This article is compiled from the manufacturers' public materials above and rewritten in my own words, not translated word for word. Sources accessed in October 2026. Brands are mentioned for illustration only; this site is not affiliated with them.
Repair service coming soon
Bookings are not open yet. You can check reference prices for common faults; we'll announce the launch on X.