Troubleshooting Servo Jitter: 6 Checkpoints from Power to Mechanics
Servo buzzing, twitching back and forth, or resetting your board whenever it moves? Based on tutorials from Arduino, SparkFun and Adafruit, check power, common ground, capacitors, signal, load and internal parts — in that order.
Contents
Servo jitter is one of the most common problems when building robots and robotic arms. It shows up in different ways: buzzing while holding an angle, small oscillations around the target position, occasional twitches, or the dev board resetting as soon as the servo moves.
Very often the problem isn't the servo itself but power and wiring. The order below follows Arduino's official documentation plus tutorials from SparkFun and Adafruit, starting with the most common and easiest fixes.
First: how a servo works
SparkFun's servo tutorial explains that a typical hobby servo receives pulses on its signal wire roughly every 20 milliseconds (50 Hz), with a pulse width usually between 1 and 2 milliseconds; about 1.5 ms corresponds to the center position. Inside, a potentiometer senses the output shaft position, and the circuit keeps correcting it toward the target angle.
Note that 1–2 ms is a convention, not a universal standard. Adafruit also mentions that pulse widths vary between brands and models, and even between individual units of the same model.
So “jitter” is essentially a servo that keeps correcting its position but never settles. The cause may be the power supply, the signal, or something inside the servo.
Checkpoint 1: Is there enough power?
This is the most common cause. A servo's current draw varies widely with load:
- A small servo in the Arduino docs draws only 5–6 mA when idle but up to 800 mA under load
- The MG996R, per the TowerPro website: 170 mA running with no load, 1400 mA stall current
- Adafruit notes that even micro servos draw a few hundred milliamps when moving, and some high-torque servos exceed 1 A each under load
USB can only supply limited current: the Arduino docs give about 500 mA for USB 2.0 and about 900 mA for USB 3.0, and SparkFun likewise considers USB power suitable only for the smallest servos.
SparkFun sums up the typical signs of insufficient power: “hunting” back and forth around the target, buzzing, or repeatedly resetting; when the servo and the board share a supply, it can also drag the board into resets or erratic behavior. If the power LED flickers whenever the servo moves, you're already in dangerous territory.
What to do:
- Don't power servos from the board's 5V pin. The Arduino Servo library docs recommend a separate supply for more than one or two servos, and Adafruit warns that drawing too much current from the board's 5V pin causes noise and voltage drops that can make the board misbehave, reset or even overheat.
- Size the supply to the servo specs. The voltage must be within the servo's rated range (TowerPro lists 4.8–6.6 V for the MG996R), with plenty of current headroom. SparkFun suggests that to get a servo's full strength, the supply should ideally provide at least 1 A per servo.
- Measure it. When in doubt, SparkFun recommends measuring the current with a multimeter and checking whether the supply voltage sags noticeably when the servo moves.
Checkpoint 2: Is there a common ground?
After switching to a separate supply, the step most often missed is the common ground: the negative (GND) of the servo supply must be connected to the board's GND. Both the Arduino Servo library docs and SparkFun stress this.
With the power off, use your multimeter's continuity beeper to check that the servo supply's negative and the board's GND are connected.
With multiple servos, SparkFun recommends “star” power distribution: use thicker wires and connect each servo directly to the supply instead of daisy-chaining them. That way, when one servo pulls the voltage down, the others are less affected.
Checkpoint 3: Add a capacitor
The Arduino docs recommend adding a capacitor to the servo supply to stabilize the voltage and reduce drops and noise; the small servo in their example uses 100 µF. Electrolytic capacitors are polarized, so check the markings on the case and don't connect them backwards.
With many servos, Adafruit's starting rule of thumb is: if the supply drops noticeably when servos move, try number of servos × 100 µF (for example, 470 µF or more for 5 servos). They also note that the right value depends on servo current, load and supply — there's no universal number.
Checkpoint 4: Signal and code
- Don't exceed the mechanical limits. SparkFun notes that a servo driven past its mechanical limits may buzz or grind its gears; if it starts clicking, the gears may be jammed. The Arduino Servo library's
attach()lets you set minimum and maximum pulse widths to limit travel. - Calibrate the pulse widths. Adafruit recommends calibrating the minimum and maximum pulse widths for the servo you actually have instead of relying on defaults.
- Don't make it jump too far at once. SparkFun mentions that servos have a maximum speed and may behave oddly when commands change too fast; add a short pause between commands to give the servo time to respond.
Checkpoint 5: Is the load too heavy?
Servos have a strength limit. For the MG996R, TowerPro lists a stall torque of 9.4 kg·cm (4.8 V) / 11 kg·cm (6.0 V). Stall torque is the value at which it can just barely no longer turn, so leave a healthy margin in normal use. With a load too close to the limit, the servo strains, heats up and buzzes. You can:
- Shorten the lever arm so the weight sits closer to the axis
- Use a counterweight or spring to take some of the load
- Switch to a higher-torque servo
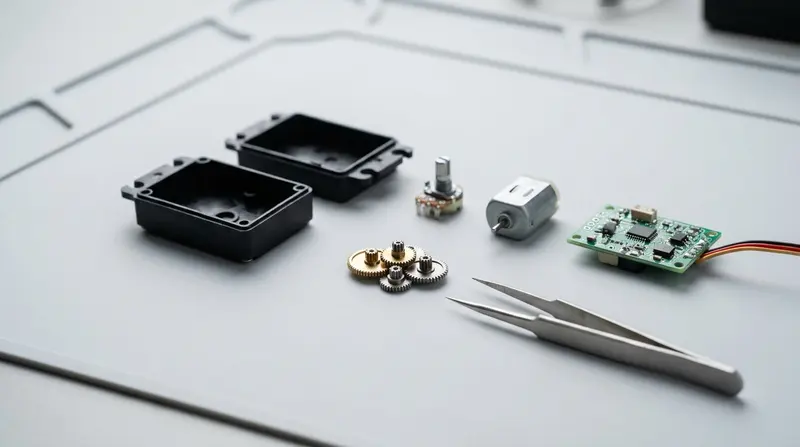
Checkpoint 6: Inside the servo
If you've ruled out all of the above, the problem may be inside the servo:
- Worn or poorly contacting potentiometer: the servo relies on the potentiometer to know its position. If it only jitters around a certain angle and changing the supply or signal doesn't help, the potentiometer is the prime suspect.
- Worn or broken gears: clicking or slipping under load usually points to the gears. SparkFun notes that plastic gears strip more easily when jammed or overloaded. For choosing and replacing gears, see this article.
With cheap servos, replacing the whole servo is often more economical once internal parts fail; if it's still under warranty, check whether opening it affects the warranty first.
Quick reference
| Symptom | Check first |
|---|---|
| The board resets when the servo moves | Power (checkpoints 1, 3) |
| Erratic or no movement after switching to a separate supply | Common ground (checkpoint 2) |
| Buzzing or grinding at the ends of travel | Travel and pulse width (checkpoint 4) |
| Jitters only under load, and gets hot | Load (checkpoint 5) |
| Jitters only around a certain angle | Potentiometer (checkpoint 6) |
| Clicking or slipping | Gears (checkpoint 6) |
References
- Arduino docs: Servo Motor Basics with Arduino
- Arduino docs: Servo library
- SparkFun: Hobby Servo Tutorial
- Adafruit: Adafruit PCA9685 16-Channel Servo Driver
- TowerPro: MG996R product page
This article is compiled from the public sources above and rewritten in my own words, not translated word for word. Sources accessed in October 2026. Go by the specs of the servo you actually have — servos sold under the same name may differ in version and parameters.
Repair service coming soon
Bookings are not open yet. You can check reference prices for common faults; we'll announce the launch on X.